Monday, November 9, 2015

Job 4: Adjust Cabinet Mechs

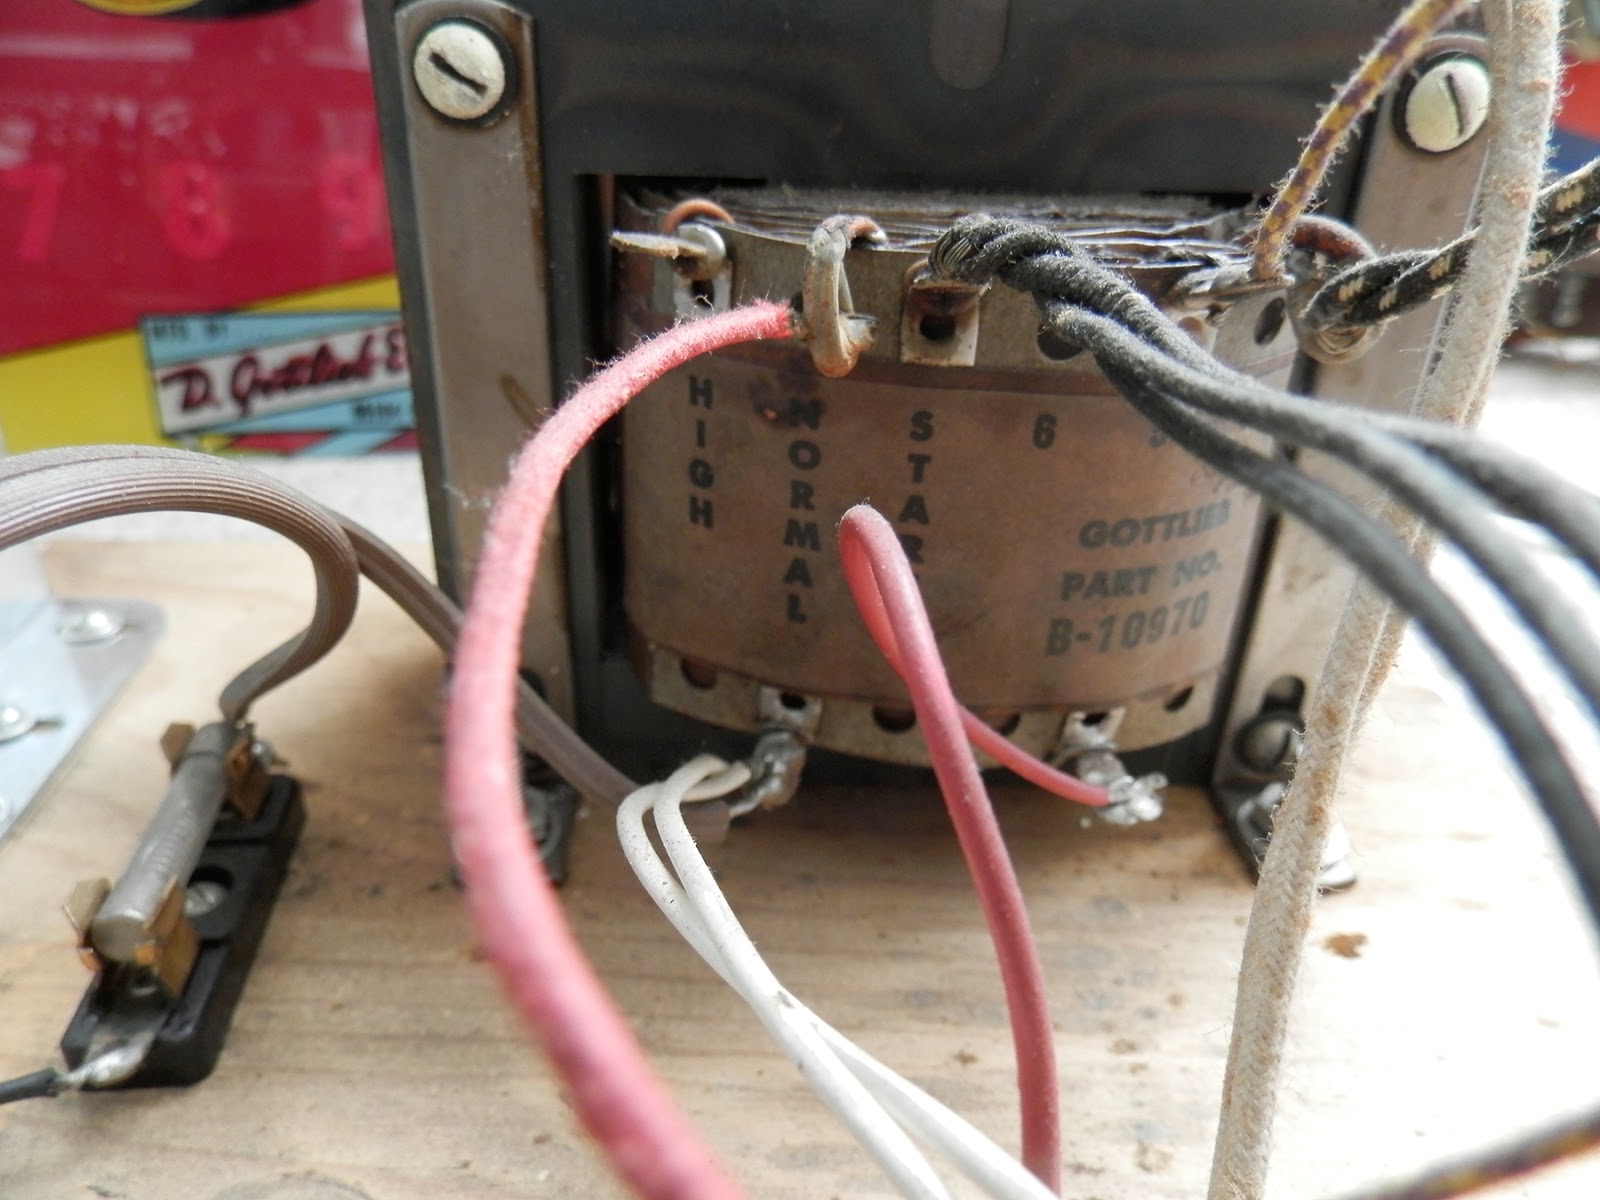
One thing I always like to do with my EM machines is boost the transformer. Out of the factory, these machines were set to normal tap, but today's grid can take the extra load and converting it to high tap power boosts the pop bumpers, making the game faster and more fun.  It's just a matter of finding the red wire on the transformer...


... un-soldering it, and re-soldering it to the high tap node.


Done!  Next, I had a look at the chimes unit, which needed a little upgrade. The middle chime especially needed help, as it was just going "thunk" instead of "ding!"  Disassembling is easy.


I cleaned things up, installed new rubber grommets on the chime bars and added new nylon washers. Then, I re-assembled the unit in the reverse order that I took it apart.


Now it sounds and looks beautiful again!

Thursday, November 5, 2015

Job 3: Refinish the Cabinet


With the head done, it's time to make the cabinet look just as nice. The first job is to remove the mechanics, which involves not only the main relay board but also the tilt mechanism and the chime unit, which are all hardwired together.  Here's what that looks like:


Next, it's time to take off the coin door, coin plate, side rails, back rail and inner hardware, leaving only the wooden shell.


The cabinet was just grimy on the inside, so I gave it a good vacuum. Here's what I found floating around in the bottom:


A bulb, a few broken fasteners, all of the relay labels from the bottom of the playfield (that might cause some trouble later on) and what appears to be a squashed, fossilized shooter tip.

Before I take off the original finish, notice the original unfaded color hiding under the side rails and legs.


Also, I noticed this bare patch on the front right side of the cabinet - probably a classic nudge spot, as players would bang the side of the machine to coax the ball during play.


Off it goes, and we're left with a bare wood cabinet.


A couple of coats of fresh paint...


... and we're ready to start the stencils. Just like with the backbox, I've cut them out of acetate and spray-glued them to the cabinet.


A light first coat goes on...


... followed by a few more, and the stencils are ready to come off.


Beautiful!  Now, the second set of stencils is done the same way.


Georgous!


Monday, November 2, 2015

Job 2: Sealing the Backglass


This is the back side of the backglass for my Flying Carpet. The dark grey areas are opaque and block the light, the light gray areas are translucent and let the light through to highlight certain areas of the artwork and the score and credit windows are transparent.


As is frequently the case with older machines, the heat and wear causes the translucent paint to flake and chip away. This backglass has a few missing chips, but I've seen a lot worse. The big problem is that it had a lot of flaking - paint raising up from the glass - and all it takes is a strong breeze for those bits to flake off.

So I bought a $5 can of Krylex Triple Thick Glaze at my local store and coated the back of the playfield. There's nothing I can do about the missing chips, but the flaking bits are now locked down, sealed tight to the glass. Potential crisis averted!

Thursday, October 29, 2015

Job 1: Refinish the Head


It's good to start a big project with something easy. As usual, Gottlieb engineers made it easy for me to gut out the mechanics and hardware of the head, leaving only the wooden box. Here, you can see the original bright mauve color, preserved from fading on the inside of the box.


After sanding, I have a clean start. No need to re-finish the inside.


After filling a few chips and scrapes with wood filler, the new base color goes on. Man, is that pink!


I created stencils based on the original artwork and carefully cut them out of acetate. The lesson I learned from Jet Spin is to use light coats of spray paint and build slowly, rather than try do cover it in one coat.


The second coat goes on...


... and the stencil comes off. Looking good! Now I just need to do the black on the other side and the yellow stripes on the sides and front.  Putting the mechanics and hardware back in is just as easy as taking them out.

Monday, October 26, 2015

Initial Assessment


Let's have a look at the new machine and see what needs to be done. I tried it out when I bought this machine and everything works except for one of the score reels (which I expect will be an easy fix). I bought it from a lovely woman in Indiana who said it was in her family since the 80's and was in a bowling alley before that - her family owned a local coin-op business. Of the machines I've worked on, I'd put it squarely in the middle - not as well looked-after as Jet Spin but not as roughly handled as Fun Land.


The cabinet will have to be re-finished for sure. Not just because of the flaking paint, but because the color is badly faded. Most Flying Carpets you see nowadays are this pale peachy pink, but the original color was actually a vibrant purplish mauve, still evident where the legs used to be and inside the cabinet and head.


I should note that the cabinet finish looks worse than it is because instead of producing cabinets with a clean, even finish, Gottlieb liked to add a surface texture called "webbing," where they'd spatter black paint across the cabinet, resulting in Jackson Pollock streaks. I think it's supposed to look marbleized. Whatever the reason, I find it ugly and won't be reproducing that effect on my machine.

The playfield is mostly dirty and I'm eager to see how it cleans up. The tarnished steel can be cleaned but I'm a big believer in keeping some of the flaws, rather than polishing everything away - keeping a few rust spots here and there preserves a bit of the game's character and shows that it had a history.


This will be the biggest challenge - there's some major playfield wear between the pop bumpers and the "boomerang" row of six standups, as well as in the center playfield. Painting and decal work will be required and another adventure with clearcoat is on the horizon.

But first things first and one job at a time.  Here's the plan: Step 1: refinish the cabinet. Step 2: repair the playfield. Step 3: Solve the mechanical issues. Step 4: enjoy one of the greatest pinball games of all time.

Thursday, October 22, 2015

New Project: Flying Carpet


Jet Spin is done and I'm enjoying it a lot, but I was looking on Craigslist and came across a project I couldn't pass up - one of my all-time favorite machines, Flying Carpet. This is a one-player Gottlieb wedgehead from 1972.

It's unusual for a few reasons - it has no inlanes at the bottom, just two pairs of vicious outlanes. And it's also missing slingshots, normally found by the flippers. It sounds difficult, but this machine is going to be a lot of fun because it's a speller - the object is to spell the words "FLYING CARPET" by hitting the standup targets and rollovers throughout the playfield, which lights the specials.

Flying Carpet was sort of an inbetween-eras game for Gottlieb because it's a puzzle-based one-player wedgehead like the ones that were popular in the 60's but it has three-inch flippers and many of the fittings and more advanced internal features found in late-70's games.

The machine I got is in decent shape, so it should be fun to restore!

Tuesday, July 7, 2015

Jet Spin Project Complete!

Jet Spin is done! After assembling everything, I just needed to adjust and fine-tune the switches and the game is working perfectly. The pitch has been increased to 4.5 degrees (the manual suggests 3.5 degrees) so it plays super-fast.  Enjoy this video I made illustrating the scoring, strategy and ending with a sample game: