Showing posts with label soldering. Show all posts

Thursday, December 24, 2015

Job 11: Repopulate the Playfield

Before clearcoating I had removed everything from the top of the playfield and taped it securely to the back. Now it's time to put everything back. This is meticulous and time-consuming work.  First, the standup targets and rollover switches went back into place, along with the flippers.


It was easier to put the flipper rubber on while they were detached.

Here's what the back of the playfield looks like now:


The pop bumpers are a tricky assembly. But first, I noticed that the right bumper's switch was broken. I had to replace it and re-solder the wires.


After that was done, I re-assembled the pops and soldered the light sockets into place.


Looking good!  Then, I went ahead and added the top arch and lower apron. Here's where we stand now:


Next, I added the light reflectors behind each of the standup targets as well as the wire ball guides and light bulbs.


Before going any further, I thought it would be a good idea to stand the machine up on its feet and attach the head...


... and see if it lights up.


Success! Well, mostly. That tens reel will need to be looked at and there are about six bulbs that aren't lighting.  And one that mysteriously is but shouldn't be.

Rubber rings went on next, along with some of the plastics. I discovered that I had mis-ordered rings and got the wrong sizes for some of the areas. That will set me back a few days, but I can use that time to troubleshoot.


Thursday, November 19, 2015

Job 6: Disassemble the Playfield

Here's what we're dealing with:


It's not a complicated playfield and it doesn't have any craziness like a roto target or spinners, but there are just a lot of switches to unscrew.  Experience has taught me to think of this job in phases. Phase one: remove the plastics, posts, bulbs, rings and other surface items.


Here's what that looks like. Notice how dirty it is under the apron and how clean it is under the posts - especially noticeable around the center targets.  Check out the engineering behind that center element.


Here's a shot of everything I removed in this first phase, which I'll clean later. Except for the 2" screws, which will be ditched in favor of Phillips-head replacements.


That's way more posts than I would have estimated and fewer rubber rings.  Those amber tubes on the left go over the bulbs to shield the plastics and surrounding areas from heat. They won't be necessary when I install LED's.

Next, it was time to disassemble the rest, which includes unscrewing the standup and rollover targets (and taping them, along with their screws, to the back of the playfield), removing the flipper bats and pop bumpers and taking off the side rails.


Turning it upside down made it easier to get at some of the screws. All that's left is to remove the wire ball guides and I have a nice flat surface to start from!

Monday, November 9, 2015

Job 4: Adjust Cabinet Mechs

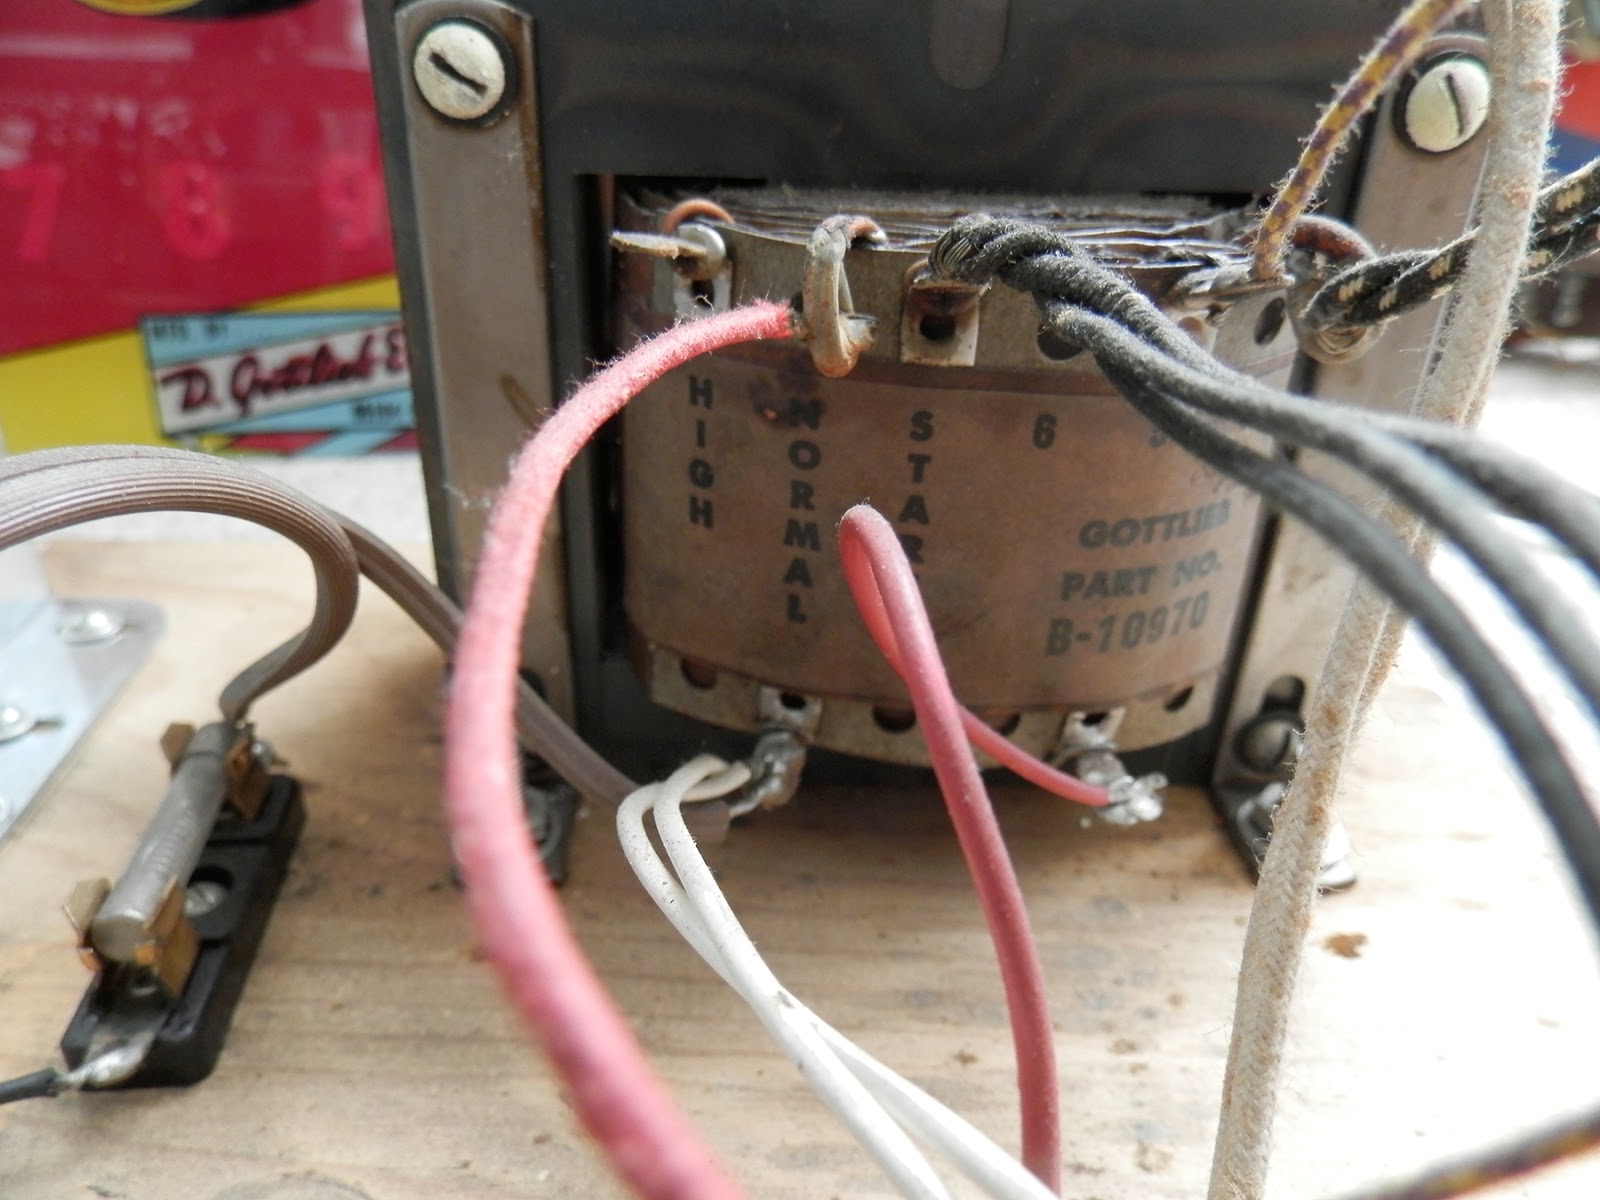
One thing I always like to do with my EM machines is boost the transformer. Out of the factory, these machines were set to normal tap, but today's grid can take the extra load and converting it to high tap power boosts the pop bumpers, making the game faster and more fun.  It's just a matter of finding the red wire on the transformer...


... un-soldering it, and re-soldering it to the high tap node.


Done!  Next, I had a look at the chimes unit, which needed a little upgrade. The middle chime especially needed help, as it was just going "thunk" instead of "ding!"  Disassembling is easy.


I cleaned things up, installed new rubber grommets on the chime bars and added new nylon washers. Then, I re-assembled the unit in the reverse order that I took it apart.


Now it sounds and looks beautiful again!

Saturday, April 25, 2015

Job 6: Clearing the Playfield

In preparation for the next steps in this restoration, I'd need to clear the playfield, removing everything until I'm left with a flat surface.  Here's where we stand:


It was mostly a matter of going under the playfield and unscrewing the mechanical pieces from the bottom. I then secured them, along with their corresponding screws, to the underside with tape or zip ties. Then I covered the holes with more tape.


The pop bumpers required some special care. Here's what they look like from below:


I removed the coil and still had to unsolder these two wires, which connect to the light socket, in order to remove the top mechanism.


Here's what the playfield looks like sans targets and rollovers:


Finally, I needed to remove the wire ball guides and nails. A gentle pull with a pair of pliers and they came right out. I made sure to number and label each one so I can put them back correctly later.


Here's what the playfield looks like totally stripped:


Flat and ready for painting!


Saturday, April 4, 2015

Job 3: Adjusting the Transformer

While the cabinet mechs were removed and easy to access during the re-finishing process, I took the opportunity to make an adjustment to the transformer.


These machines leave the factory with the main power line (the upper red wire) set to the "normal" lower-voltage output node on the transformer.  So I clipped it and re-soldered the wire to the "high" output node.


This should give the pop bumpers and kicker some extra power and maybe spin the wheel a little faster.  A simple adjustment that will make the game quicker and more fun!


Wednesday, February 11, 2015

Saturday, February 7, 2015

Job 8: Flipper Coils & EOS Switches

When I first got the machine and took a preliminary assessment, I noticed that the flippers were a little buzzy. About a week later, I discovered that they were so weak that I couldn't get the ball up past the spinners in mid-field. So I opened her up and quickly realized the problem.


The way these flippers work is that when the button is pushed, it activates a the solenoid (seen here with a torn cover) that pulls a piston through its center, cranking the flipper on the top of the playfield.  What's clever about flipper solenoids is that they're two solenoids in one - a high power coil and a low power coil in a single unit.  When it's first activated, the high power coil gives the flipper the energy to propel the ball all the way up the playfield. Then, in the fully-depressed position, a tab on the crank opens an "end of stroke" (EOS) switch, changing it over to low power, so the player can hold the flipper up without burning out the coil.

As you can see in the photo above, the EOS switch is bent all out of shape, so only the low-power part of the solenoid was activating. Trying to re-bend it back was a futile effort.


I replaced the coils and the EOS switches and once again, it's flipping as it should! Let those spinners rip!


Tuesday, February 3, 2015

Job 7: Refinishing the Cabinet


With the backbox done, it was time to move on to the big job: refinishing the body cabinet.  The first order of business was to take things apart. The head and pedestal came off, I slid the glass out, removed the playfield and cabinet mechanism board and took off the legs. All of this tucked away in the corner of my kitchen.


That left me with the body cabinet...


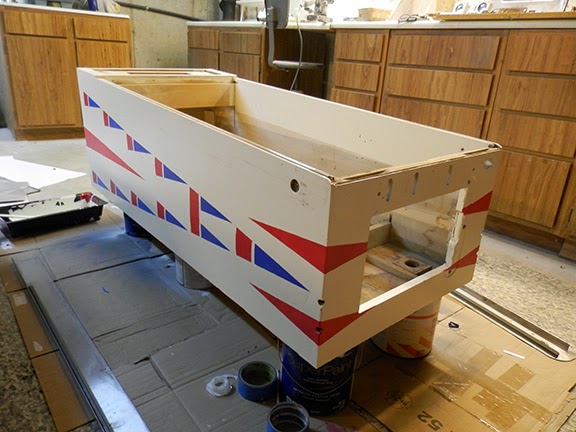
... which still needed some disassembly, once I got it to the workshop.  I took off the coin door, play field lock lever, side rails, flipper buttons and a few other pieces and carefully set them aside.


Check out the unexposed finish that was under the side rails - it really shows how the machine has aged over the years - probably in an arcade that allowed smoking.


Also, note the discoloration to the front of the machine from decades of sodas accidentally getting spilled all over the machine and seeping into the cabinet.


Fortunately, the damage wasn't at all severe.  Here's a final look at the stencil work before it gets sanded away:


And it sanded up really well.


Primer and paint were applied...


...and the stencils went back on.


I have to admit that the stencils were tricky. They bled a little bit, so I had to go back with a fine brush to clean up the edges and sharpen the lines.  Next, it was ready for the hardware to go back on.


Done!  Now I just had to get it back home, re-install the legs (with felt pads to protect the new finish), attach the cabinet mechs, playfield, glass, pedestal and head and plug her in. Here's where we started:


And here's the machine now:


Beautiful!

A few more minor fixes and everything should be ready to go!


Wednesday, January 21, 2015

Job 6: Refinishing the Head


Finally, we get to some of the big jobs. As I wrote in an earlier post, the machine is in good mechanical shape, but needed a cosmetic facelift. Over 40 years of dings, scrapes, grime and cigarette burns have taken their toll on my Fun Land, but there are no major holes or cracks to address. However, this part of the restoration did take me a few weeks, mainly because I had to wait for layers of paint to dry.

I figured the best way to do it was to break up the cabinet refinishing into smaller jobs and tackle one at a time, starting with the head. First, I took out the backglass and the mechanical guts and set them aside. EM machines are so easy to take apart - everything is modular.


Next, I sanded it town to the bare wood. It was made in the 60's, so they probably used lead-based paint.


I filled in a few of the small dings and gouges with wood filler and gave the whole thing a coat of primer.


Then, I was ready to paint. I chose a classic creamy off-white - the color of a vanilla milkshake - rather than a stark white.


Next, it was time to stencil the designs back on.


Finally, it was time to re-install the hardware and mechanical parts. Looking beautiful!


I also re-finished the pedistal at the same time. I decided to re-assemble everything, just to make sure the electrical connections were good.


And it works beautifully!  Notice how the blue and red are a perfect match to the un-refinished body cabinet. And how clean and bright the head looks next to the body.  

Just as a reminder, here's the head before restoration:


...and here it is now: