Showing posts with label paint. Show all posts

Thursday, December 3, 2015

Job 8: Decals

The painting is done, but there are some parts of the playfield art that take a different approach. Namely, the black circles around the inserts and the six scoring labels that I repainted.  That's where we use waterslide decals - the same kind that come with model car and airplane kits.

First, I created a graphic with the text and shapes that I need and printed it on special decal paper in four colors (even though it's all black) on a laser jet printer.  Then, I cut out the shapes, soaked them one at a time in water, placed them on the playfield and slid the backing paper out gently.  Here's the work in progress:


The L and P have decals and the A and I do not.  Two down, 22 to go.  Here's that same part of the playfield an hour later:


Just for comparison, here's the whole playfield before decals...


... and after:


A vast improvement, I'd say.

Thursday, November 26, 2015

Job 7: Painting the Playfield


Here's another job best done in phases. Step one of repairing the playfield paint is touching up the smaller dings and scratches with a brush. It's already much improved.


There are some larger areas, however, where a brush leaves ugly streaks and a different approach is required. Time to upgrade to airbrushing.  The first areas I'll tackle are the solid white blocks that will lie under the playfield plastics. I'm starting here because there's no paint matching required, they cover a lot of area, they've yellowed with age and because brightening the playfield under the plastics will reflect more light and create a brighter game.

I started by applying clear adhesive frisket, carefully cutting out the shapes and masking the rest of the playfield with scrap paper.


Then, I sprayed it with white paint.


I removed the masking paper...


 ... and the frisket...


... and did a little cleanup around the edges. You can already see a huge improvement.  Next, I'll repeat the process with some of the more damaged off-white target labels and part of the swoosh that runs through the upper left.


You may be asking why I went to the trouble of mixing an off-white khaki color, rather than re-paint all the labels stark white.  A few reasons: There are a whole lot of those labels and not only would I have to paint them, but I'd have to decal the text back into place, which is a lot of work - only six were damaged enough to need re-painting. I like the contrast and appreciate that it shows the machine's age and history in a subtle way. Also, the white inserts and posts have aged into a light beige and they'd really stick out against stark white labels. Since I have no need, desire or interest in replacing all 48 posts and 12 white inserts and making sure the decals are on perfectly straight, I've decided to keep the off-white theme going and paint the labels accordingly.

I had one last round of airbrush painting: the reds at the top of the playfield were a big part of the damaged area. You'd think red would be an easy color to match, but it turns out Gottlieb's color was more like a deep orange. It took a lot of trial and error to get it right.


Finally, I was ready for a few touch-ups. Mostly re-defining the black outlines with a liner brush.


Thursday, November 12, 2015

Job 5: Re-assemble the cabinet

With the cabinet re-painted and the internal mechs adjusted, it was time to re-attach the hardware. While everything was disassembled and I was waiting for the paint to dry, I got new springs and a new bushing for the shooter rod, shined up the coin door and strike plate and installed a new red start button, new coin slots and pricing labels.


Then, I just needed to install the cabinet mechs and re-attach the tilt switch, power button, knocker and chimes.


Done! With the cabinet completed, about a third of the hard work is done. Now comes the hard part - restoring the playfield.


Thursday, November 5, 2015

Job 3: Refinish the Cabinet


With the head done, it's time to make the cabinet look just as nice. The first job is to remove the mechanics, which involves not only the main relay board but also the tilt mechanism and the chime unit, which are all hardwired together.  Here's what that looks like:


Next, it's time to take off the coin door, coin plate, side rails, back rail and inner hardware, leaving only the wooden shell.


The cabinet was just grimy on the inside, so I gave it a good vacuum. Here's what I found floating around in the bottom:


A bulb, a few broken fasteners, all of the relay labels from the bottom of the playfield (that might cause some trouble later on) and what appears to be a squashed, fossilized shooter tip.

Before I take off the original finish, notice the original unfaded color hiding under the side rails and legs.


Also, I noticed this bare patch on the front right side of the cabinet - probably a classic nudge spot, as players would bang the side of the machine to coax the ball during play.


Off it goes, and we're left with a bare wood cabinet.


A couple of coats of fresh paint...


... and we're ready to start the stencils. Just like with the backbox, I've cut them out of acetate and spray-glued them to the cabinet.


A light first coat goes on...


... followed by a few more, and the stencils are ready to come off.


Beautiful!  Now, the second set of stencils is done the same way.


Georgous!


Monday, November 2, 2015

Job 2: Sealing the Backglass


This is the back side of the backglass for my Flying Carpet. The dark grey areas are opaque and block the light, the light gray areas are translucent and let the light through to highlight certain areas of the artwork and the score and credit windows are transparent.


As is frequently the case with older machines, the heat and wear causes the translucent paint to flake and chip away. This backglass has a few missing chips, but I've seen a lot worse. The big problem is that it had a lot of flaking - paint raising up from the glass - and all it takes is a strong breeze for those bits to flake off.

So I bought a $5 can of Krylex Triple Thick Glaze at my local store and coated the back of the playfield. There's nothing I can do about the missing chips, but the flaking bits are now locked down, sealed tight to the glass. Potential crisis averted!

Thursday, October 29, 2015

Job 1: Refinish the Head


It's good to start a big project with something easy. As usual, Gottlieb engineers made it easy for me to gut out the mechanics and hardware of the head, leaving only the wooden box. Here, you can see the original bright mauve color, preserved from fading on the inside of the box.


After sanding, I have a clean start. No need to re-finish the inside.


After filling a few chips and scrapes with wood filler, the new base color goes on. Man, is that pink!


I created stencils based on the original artwork and carefully cut them out of acetate. The lesson I learned from Jet Spin is to use light coats of spray paint and build slowly, rather than try do cover it in one coat.


The second coat goes on...


... and the stencil comes off. Looking good! Now I just need to do the black on the other side and the yellow stripes on the sides and front.  Putting the mechanics and hardware back in is just as easy as taking them out.

Saturday, May 16, 2015

Job 9: Clearcoating

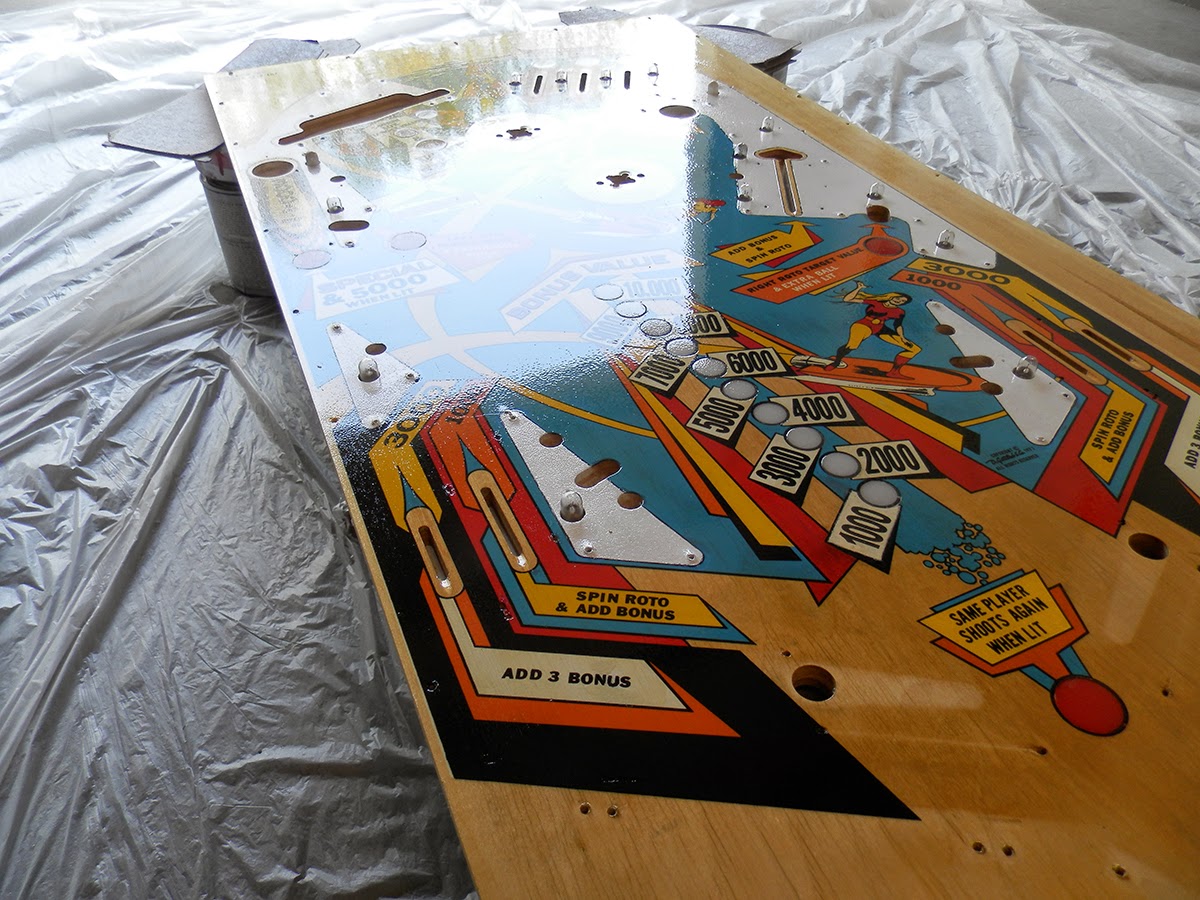
Many of the steps in this restoration have been nerve-wracking, but clearcoating the playfield has worried me the most - and with good reason. It's an involved, irreversible, expensive and toxic process and I wanted to get it right.  I spent weeks gathering all the supplies I needed and ended up going to a dozen specialty stores in the process.  Finally, the day arrived - I cleared my schedule on a Saturday when it wasn't too cool and the humidity was low.

I started by cleaning out my garage, sweeping the floor and corners, walls and even the ceiling to reduce the possibility of dust and dirt falling into the wet clearcoat. Then, I spread a drop cloth and positioned my playfield on some paint cans, carefully leveling it with cardboard shims. The clearcoat will pool and run downhill, so it's important to have the playfield perfectly level.


Once it was in position, I wiped the surface with a tack rag to remove loose dust and cleaned with naphtha to remove any moisture or oils.  Then it was time to suit up.


Gloves, Tyvek suit, respirator and goggles are a must - the chemicals are very toxic.  Now I was ready to clean out the spray gun, mix the two-part clearcoat, fire up the air compressor and give my playfield its first coat.


Gorgeous!  I gave it a very light coat at first, because I was worried about how the decals I used would react to the chemicals and, unfortunately, there were some very small pieces that disintegrated. Nothing I couldn't live with, though.  After this, I carefully cleaned out my measuring cups and gun with lacquer thinner.

I let this set up for a few hours, lightly sanded to give the next coat some "tooth," cleaned with a tack cloth and naptha, and went through the whole process again for the second and third coats. Dry time was about four hours between coats, and that was using the "fast" activator.

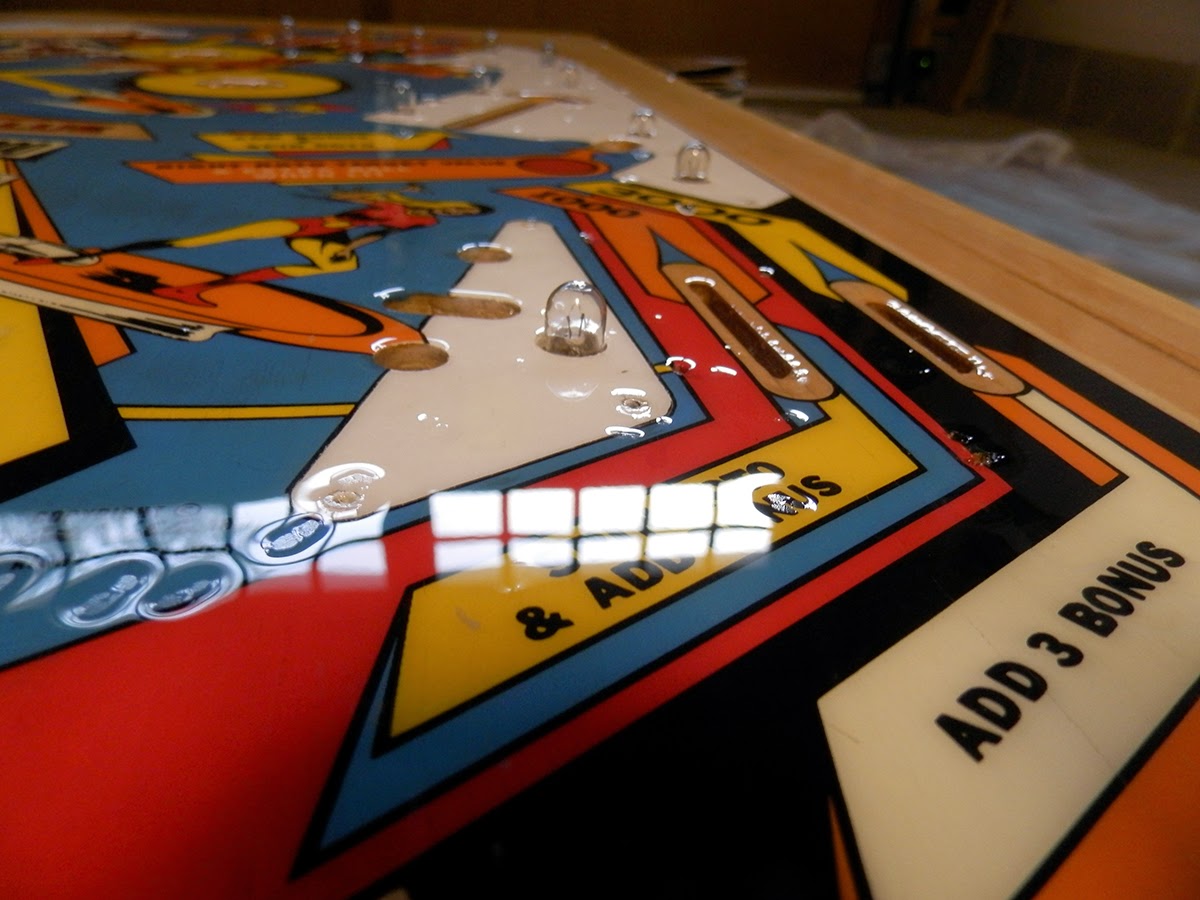
It was looking really good and I decided that since I was set up and had enough chemicals left and that first coat was rather thin, I'd put on an extra-protective fourth coat. My hubris was rewarded with this:


Fisheyes!  This is what happens when moisture gets into the spray gun.  Looking back, I should have changed out my air filter after the second or third coat. My beautiful glossy playfield was now full of these horrible divots.  So the next morning, I mixed up a small batch of clear and used an eyedropper to fill each pock mark and then let it set. Then, I took some sandpaper and leveled each one out. Finally, I gave the whole playfield a sanding with 400, 800, 1200, 1500 grit and ending with 2000 grit sandpaper. Here's what those fisheyes look like now:


The next step is to let the clearcoat cure. I brought it back inside and am storing it in its cabinet where it will be safe and at a relatively consistent temperature.  In about three weeks, I'll buff it and polish back the shine.

I'm over the hump! The end is in sight! Every step from here on out involves putting the machine back together, so I'm excited to finally get to play this machine again later this summer.