Thursday, February 26, 2015
SOLD!
This is the spot in my kitchen where, until today, my Fun Land lived.
After making the gameplay videos posted earlier, I placed an ad on Pinside.com and put up "for sale" posts on the forum pages. Within a few hours I had three responses and one of them was serious enough about the machine to plan a trip from Cleveland. Less than two weeks later, they arrived with plastic wrap and a pickup truck, bought my machine and took it to its new home at a well-curated boutique arcade.
They told me that they were used to buying and fixing worn out machines, but this was the nicest purchace they'd yet made - a plug-and-play machine!
I hope my Fun Land loves its new home and that the new owners love playing it. But don't be sad for me - I've already bought my next project machine and have gotten a head start on it!
More to come soon!
Labels:
1960's,
1968,
arcade,
classic,
electro-mechanical,
EM,
flipper,
Fun Land,
Gottlieb,
hobby,
pinball,
refinish,
rehab,
restoration
Wednesday, February 11, 2015
Fun Land Pinball Demo
Here's a video of my machine in action, after all of my improvements and re-finishes. Enjoy!
Demo Game
Now that the game is in good working order and the cabinet is re-finished, here's a game demo video:
Monday, February 9, 2015
Job 9: More Small Stuff
All that's left to get this machine presentable is a few little details. My second Marco order for this machine came in just the other day!
Brand new pop bumber caps.
New nylon-footed levelers that won't scratch up my hardwood floors.
Shiny new flipper buttons. The new ones are on the left and you can compare them with the well-worn set on the right.
Here's what they look like in place.
New coin slot decals!
Brand new pop bumber caps.
New nylon-footed levelers that won't scratch up my hardwood floors.
Shiny new flipper buttons. The new ones are on the left and you can compare them with the well-worn set on the right.
Here's what they look like in place.
New coin slot decals!
Labels:
1960's,
arcade,
classic,
electro-mechanical,
EM,
flipper,
Fun Land,
Gottlieb,
hobby,
pinball,
refinish,
rehab,
restoration,
wiring
Saturday, February 7, 2015
Job 8: Flipper Coils & EOS Switches
When I first got the machine and took a preliminary assessment, I noticed that the flippers were a little buzzy. About a week later, I discovered that they were so weak that I couldn't get the ball up past the spinners in mid-field. So I opened her up and quickly realized the problem.
The way these flippers work is that when the button is pushed, it activates a the solenoid (seen here with a torn cover) that pulls a piston through its center, cranking the flipper on the top of the playfield. What's clever about flipper solenoids is that they're two solenoids in one - a high power coil and a low power coil in a single unit. When it's first activated, the high power coil gives the flipper the energy to propel the ball all the way up the playfield. Then, in the fully-depressed position, a tab on the crank opens an "end of stroke" (EOS) switch, changing it over to low power, so the player can hold the flipper up without burning out the coil.
As you can see in the photo above, the EOS switch is bent all out of shape, so only the low-power part of the solenoid was activating. Trying to re-bend it back was a futile effort.
I replaced the coils and the EOS switches and once again, it's flipping as it should! Let those spinners rip!
Labels:
1960's,
arcade,
classic,
electro-mechanical,
EM,
end of stroke,
EOS,
flipper,
Fun Land,
Gottlieb,
hobby,
pinball,
refinish,
rehab,
restoration,
soldering,
solenoid,
stencil,
wiring
Tuesday, February 3, 2015
Job 7: Refinishing the Cabinet
With the backbox done, it was time to move on to the big job: refinishing the body cabinet. The first order of business was to take things apart. The head and pedestal came off, I slid the glass out, removed the playfield and cabinet mechanism board and took off the legs. All of this tucked away in the corner of my kitchen.
That left me with the body cabinet...
... which still needed some disassembly, once I got it to the workshop. I took off the coin door, play field lock lever, side rails, flipper buttons and a few other pieces and carefully set them aside.
Also, note the discoloration to the front of the machine from decades of sodas accidentally getting spilled all over the machine and seeping into the cabinet.
And it sanded up really well.
Primer and paint were applied...
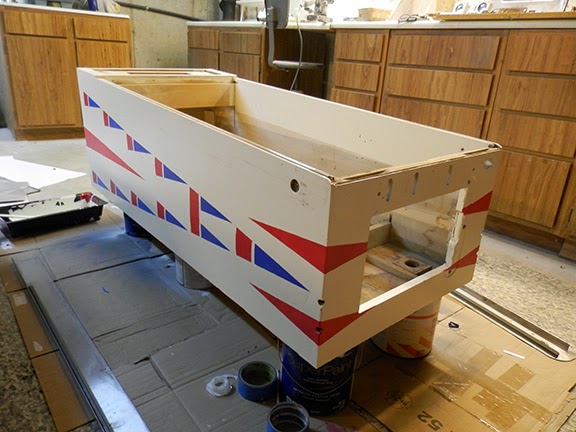
...and the stencils went back on.
I have to admit that the stencils were tricky. They bled a little bit, so I had to go back with a fine brush to clean up the edges and sharpen the lines. Next, it was ready for the hardware to go back on.
Done! Now I just had to get it back home, re-install the legs (with felt pads to protect the new finish), attach the cabinet mechs, playfield, glass, pedestal and head and plug her in. Here's where we started:
And here's the machine now:
Beautiful!
A few more minor fixes and everything should be ready to go!
Labels:
1960's,
arcade,
classic,
electro-mechanical,
EM,
Fun Land,
Gottlieb,
hobby,
paint,
pinball,
refinish,
rehab,
restoration,
soldering,
stencil,
wiring
Subscribe to:
Posts (Atom)


